Features Explained
Chemical Resistance — Chemseal is coated with a chemical resistant silicone or if conditions dictate, a polysulfide.
Watertight — Chemseal is installed with the tensionless bellows facing the liquid ensuring that watertightness is achieved.
Non-Invasive Anchoring — there are no hard metal-to-substrate connections with Chemseal. This includes embedded pins, anchors, screws, bolts or tracks, trays or rails. The system is locked to the joint faces by means of the:
1) Backpressure of the foam
2) The epoxy adhesive
3) The injected sealant band at the joint face to foam-and-bellows interface.
NSF Compliant — Complies with FDA regulation CFR 177.2600 covering indirect food contact
Composition
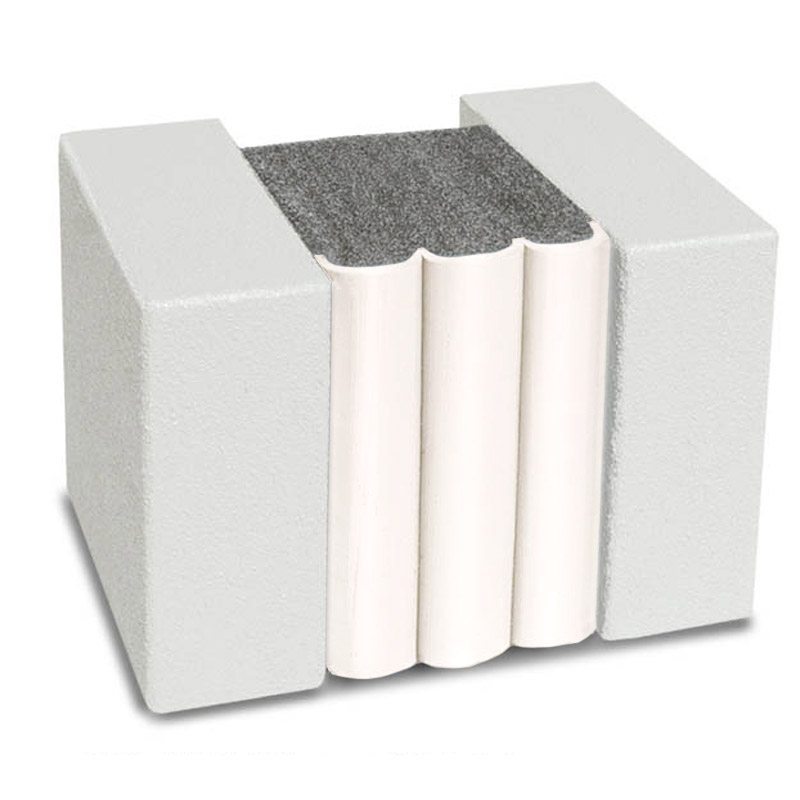
- Produced by infusing a cellular foam base material with a hydrophobic, microsphere-modified acrylic impregnation, and coating the surface with a high-performance silicone or polysulfide sealant to suit the application.
- The external sealant facing is factory applied to the foam at a width greater than maximum joint extension and is cured before final compression.
- Silicone or polysulfide application and curing takes place in a temperature and humidity-controlled factory environment. This ensures, in contrast to field applied liquid sealant and backer rod installations, that no movement takes place during curing that can cause deformation or stresses in the sealant material.
- The material is precompressed to less than the joint size for easy insertion.
- When compressed, a bellows is created in the coating. As joint movement occurs the bellows simply folds and unfolds free of tension on the bond line, and virtually free of tensile stresses in the silicone material.
- The material is supplied in 6.56 LF (2m) shrink-wrapped lengths (sticks). After removal from the shrink-wrap and hard board restraining packaging, it expands gradually.
- The foam provides a resilient backing to the silicone coating, making the system capable of resisting resisting reasonable head pressures
- Chemseal can be manufactured with a polysulfide coating in place of the standard silicone seal. While polysulfide may offer a wider range of chemical resistance, it necessitates a more complicated installation procedure. Consult EMSEAL for your specific chemical resistance needs.
Design Considerations
Substrates must be solid, parallel, plumb and capable of resisting approximately 2.5 psi backpressure from the foam.
Chemseal will maintain its watertight capabilities and shape under a constant submerged depth (hydrostatic pressure) of up to 5 feet. For greater head pressures see Submerseal.
After installation, the system must be allowed a minimum of seven days for the components to properly cure before submerging.
Transitions & Terminations
Universal-90’s
(US Patent 9,200,437; 9,637,915)
- Universal-90’s (or U-90’s) are factory-made 90-degree transition pieces that ensure continuity-of-seal where expansion joints change plane.
- Use of U-90’s eliminates the field work needed to make plane changes making overall installation fast and efficient.
- Watertightness through the plane change is guaranteed–leaving nothing to chance in field-fabricating inside and outside transitions.
- U-90 transitions are symmetrically coated on both faces allowing them to be installed as an inside corner or as an outside corner.
- Straight-run sticks are joined in the field to the U-90’s.
- U-90’s have a 12-inch (305mm) long leg and a 6-inch (152mm) vertical piece on each side of the elbow.
Custom-90’s
(US Patent 10,570,611)
- Custom-90’s, are factory-fabricated inside and outside 90-degree transition pieces coated on just the weather-facing faces.
- Custom-90’s are available when field conditions and measurements are known up front.
- Custom-90’s are widely used applications where numerous inside and outside 90-degree transitions are required. Consult EMSEAL.
Maintenance
- As with any construction product, the useful life of the material can be maximized with routine inspection and repair if required.
- Clearing of surface debris and inspection will reveal any damage to the product or adjacent substrates that might affect building performance.
- EMSEAL precompressed sealants are easily repaired–requiring only damaged sections to be removed and reinstalled–not the entire length of the joint as is typical of extruded-seal systems.
Availability and Price
- Available for shipment internationally.
- Prices are available from local distributors or representatives and/or directly from the manufacturer.
- The product range is continually being updated, and accordingly EMSEAL® reserves the right to modify or withdraw any product without prior notice.